

A complete shed plan includes nine essential elements: overall dimensions with elevations, foundation and floor details, wall framing layouts with stud spacing, rafter or truss templates with cut angles, door and window schedules, shopping lists by board length, cut diagrams, fastener schedules, and tool lists. Without these components, builders face material waste, structural problems, and project delays.
Key Takeaways:
• Complete plans prevent costly material waste and construction delays
• Foundation details and wall framing layouts are non-negotiable for structural integrity
• Cut diagrams and fastener schedules are often missing but save hours of work
• Door and window schedules ensure proper fit and function
• Shopping lists organized by board length streamline material purchasing
• Rafter templates with cut angles eliminate guesswork on roof construction
• Tool lists help builders prepare adequately before starting
• Plans don’t need to include permits, site surveys, or local code compliance
• A good checklist helps evaluate plan quality before purchase
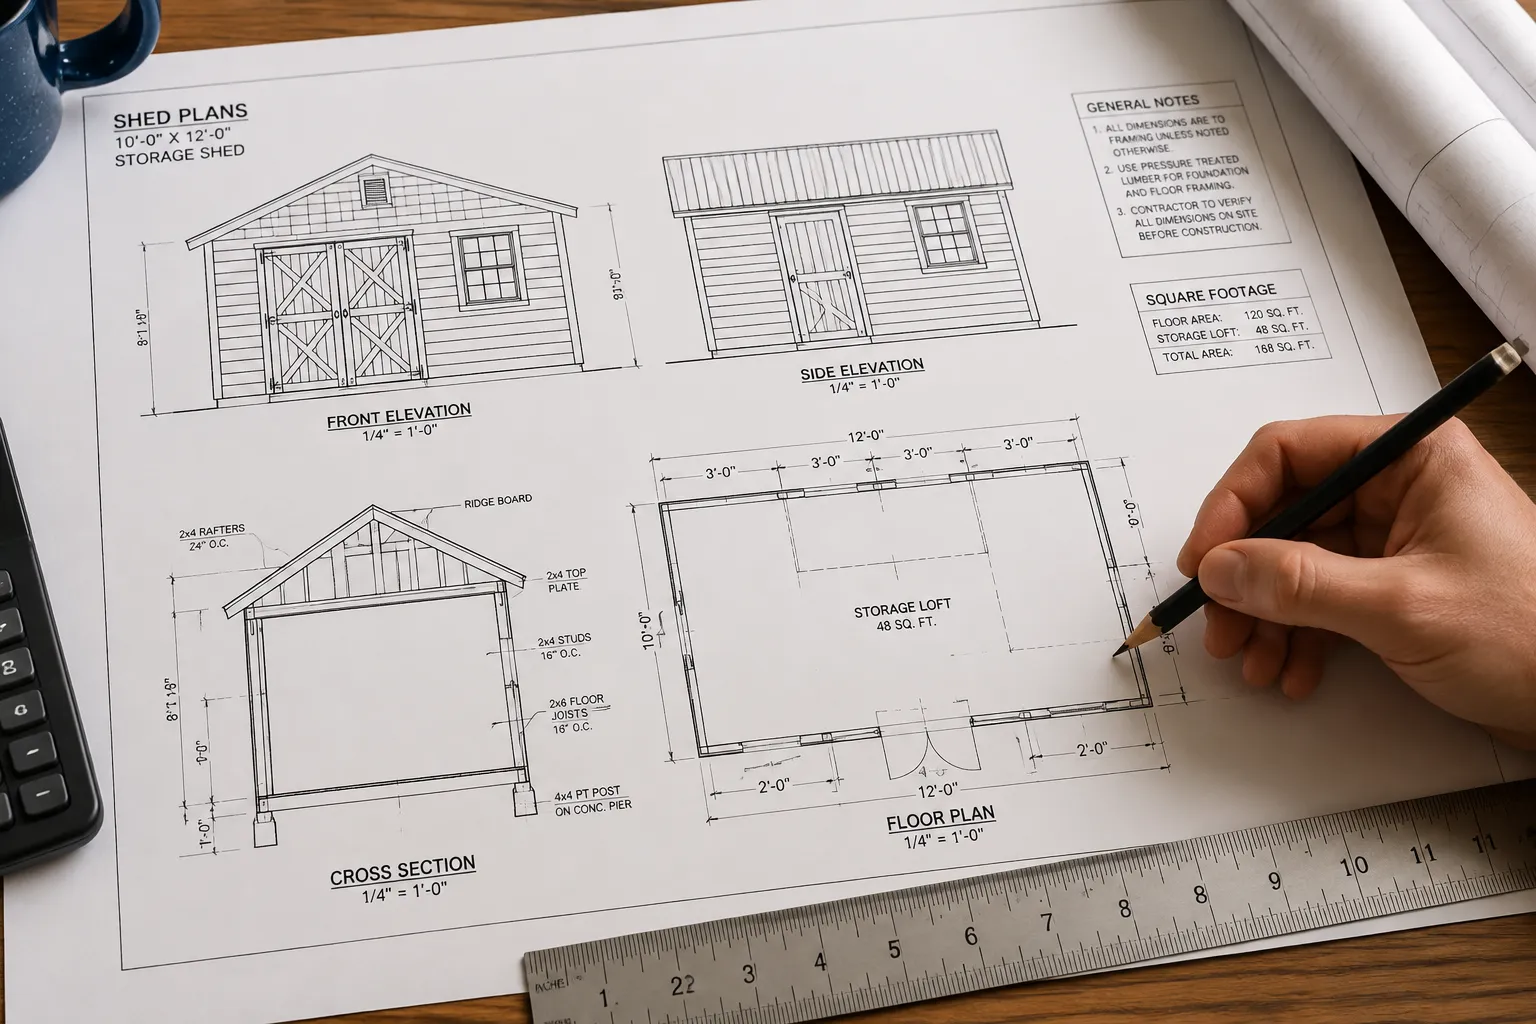
What Should a Good Shed Plan Include?
A complete shed plan includes nine elements: overall dimensions with elevations, a foundation and floor detail, wall framing layouts with stud spacing, a rafter or truss template with cut angles, a door and window schedule, a shopping list by board length, a cut diagram, a fastener schedule, and a tool list. These components work together to guide every aspect of construction from foundation to roof.
Here’s the complete list for easy reference:
- Overall dimensions with elevations – Shows the shed from all four sides with measurements
- Foundation and floor detail – Specifies footing requirements and floor construction
- Wall framing layouts with stud spacing – Details how walls are constructed and connected
- Rafter or truss template with cut angles – Provides exact roof construction specifications
- Door and window schedule – Lists all openings with sizes and hardware requirements
- Shopping list by board length – Organizes materials to minimize waste and trips to the store
- Cut diagram – Shows how to cut lumber efficiently from standard board lengths
- Fastener schedule – Specifies screws, nails, and bolts for each connection
- Tool list – Identifies all tools needed to complete the project
Without these nine elements, even experienced builders encounter problems that cost time and money.
The Nine Elements, Explained
Overall Dimensions with Elevations
A proper shed plan shows the structure from all four sides with clear measurements marked in feet and inches. These elevation drawings reveal the roof pitch, wall heights, and how components connect visually.
Why it matters: Elevations help you understand the finished appearance and catch design problems before cutting lumber. They also show critical details like roof overhangs and trim placement that affect both function and aesthetics.
What goes wrong without it: Builders often discover that doors won’t clear the roof overhang or that windows sit too high or low for practical use. I’ve seen builders reconstruct entire walls because they misunderstood how the roof connected to the walls.
Foundation and Floor Detail
Foundation specifications include the type of base required (concrete slab, gravel pad, or pier system), dimensions, and drainage considerations. Floor details show joist spacing, subfloor thickness, and connection methods.
Why it matters: The foundation determines how level and stable your shed will be for decades. Poor foundation planning leads to sagging floors, stuck doors, and structural problems that are expensive to fix later.
What goes wrong without it: Many builders underestimate foundation requirements and end up with sheds that shift, settle, or flood during heavy rain. Inadequate floor joists create bouncy floors that can’t support heavy equipment safely.
Wall Framing Layouts with Stud Spacing
Wall framing diagrams show exactly where each stud, header, and plate goes, including stud spacing (typically 16 or 24 inches on center). These layouts also indicate how corners connect and where blocking is needed.
Why it matters: Proper framing ensures the shed can handle wind loads, snow loads, and the weight of stored items. Consistent stud spacing also makes it easier to attach shelving and hooks later.
What goes wrong without it: Walls may be too weak to support the roof load, especially in areas with heavy snow. Inconsistent stud spacing makes it nearly impossible to find solid attachment points for heavy shelving or tool hangers.
Rafter or Truss Template with Cut Angles
Roof construction details include the exact angles for cuts at the ridge, bird’s mouth notches where rafters sit on walls, and tail cuts for overhangs. These templates work like patterns for cutting identical pieces.
Why it matters: Roof construction involves complex angles that must be precise for proper fit. Getting these cuts wrong means rafters won’t sit flush, creating gaps and weak connections.
What goes wrong without it: Builders waste significant lumber trying to figure out the correct angles through trial and error. Poorly cut rafters create uneven roof lines and potential leak points where pieces don’t fit tightly.
Door and Window Schedule
The schedule lists every opening with exact dimensions, hardware requirements, and installation details. This includes rough opening sizes, which are larger than the actual door or window to allow for proper installation.
Why it matters: Doors and windows must fit precisely in their openings while allowing space for adjustment and insulation. The schedule ensures you buy the right sizes and have necessary hardware on hand.
What goes wrong without it: Builders often cut openings too small or too large, requiring expensive modifications or replacement materials. Missing hardware details lead to multiple store trips and project delays.
Shopping List by Board Length
A well-organized material list groups lumber by length and specifies the quantity needed of each size. For example, it might call for “12 pieces of 2x4x8” rather than just listing “2×4 studs.”
Why it matters: Lumber yards sell boards in standard lengths (8, 10, 12, 16 feet), so organizing your list this way minimizes waste and reduces costs. You can also make fewer trips to the store.
What goes wrong without it: Builders typically over-purchase materials by 20-30% because they can’t calculate exact needs. This wastes money and creates disposal problems for leftover lumber.
Cut Diagram
Cut diagrams show how to cut multiple pieces from single boards efficiently. For example, a diagram might show cutting two 45-inch pieces from one 8-foot board, leaving a 6-inch waste piece.
Why it matters: Strategic cutting reduces waste and saves money on materials. It also helps you verify that your shopping list quantities are accurate before starting construction.
What goes wrong without it: Random cutting typically wastes 15-25% of purchased lumber. Builders also run short of materials partway through the project because they didn’t plan cuts efficiently.
Fastener Schedule
The fastener schedule specifies exactly which screws, nails, bolts, or other connectors to use for each joint. It includes sizes, quantities, and sometimes specific brands or grades for critical connections.
Why it matters: Different connections require different fasteners for proper strength and durability. Using the wrong fasteners can create weak points that fail under load or weather exposure.
What goes wrong without it: Builders often use whatever fasteners they have on hand, which may not provide adequate holding power. This leads to loose connections, squeaky floors, and potential structural failure.
Tool List
A comprehensive tool list identifies every tool needed for the project, from basic hand tools to specialized items like a circular saw or drill bits. It often separates essential tools from optional ones that speed up work.
Why it matters: Having the right tools available prevents work stoppages and ensures quality results. Some operations are nearly impossible without the correct tools.
What goes wrong without it: Projects stall when builders discover they need tools they don’t own. Attempting to work around missing tools usually produces poor results and safety hazards.
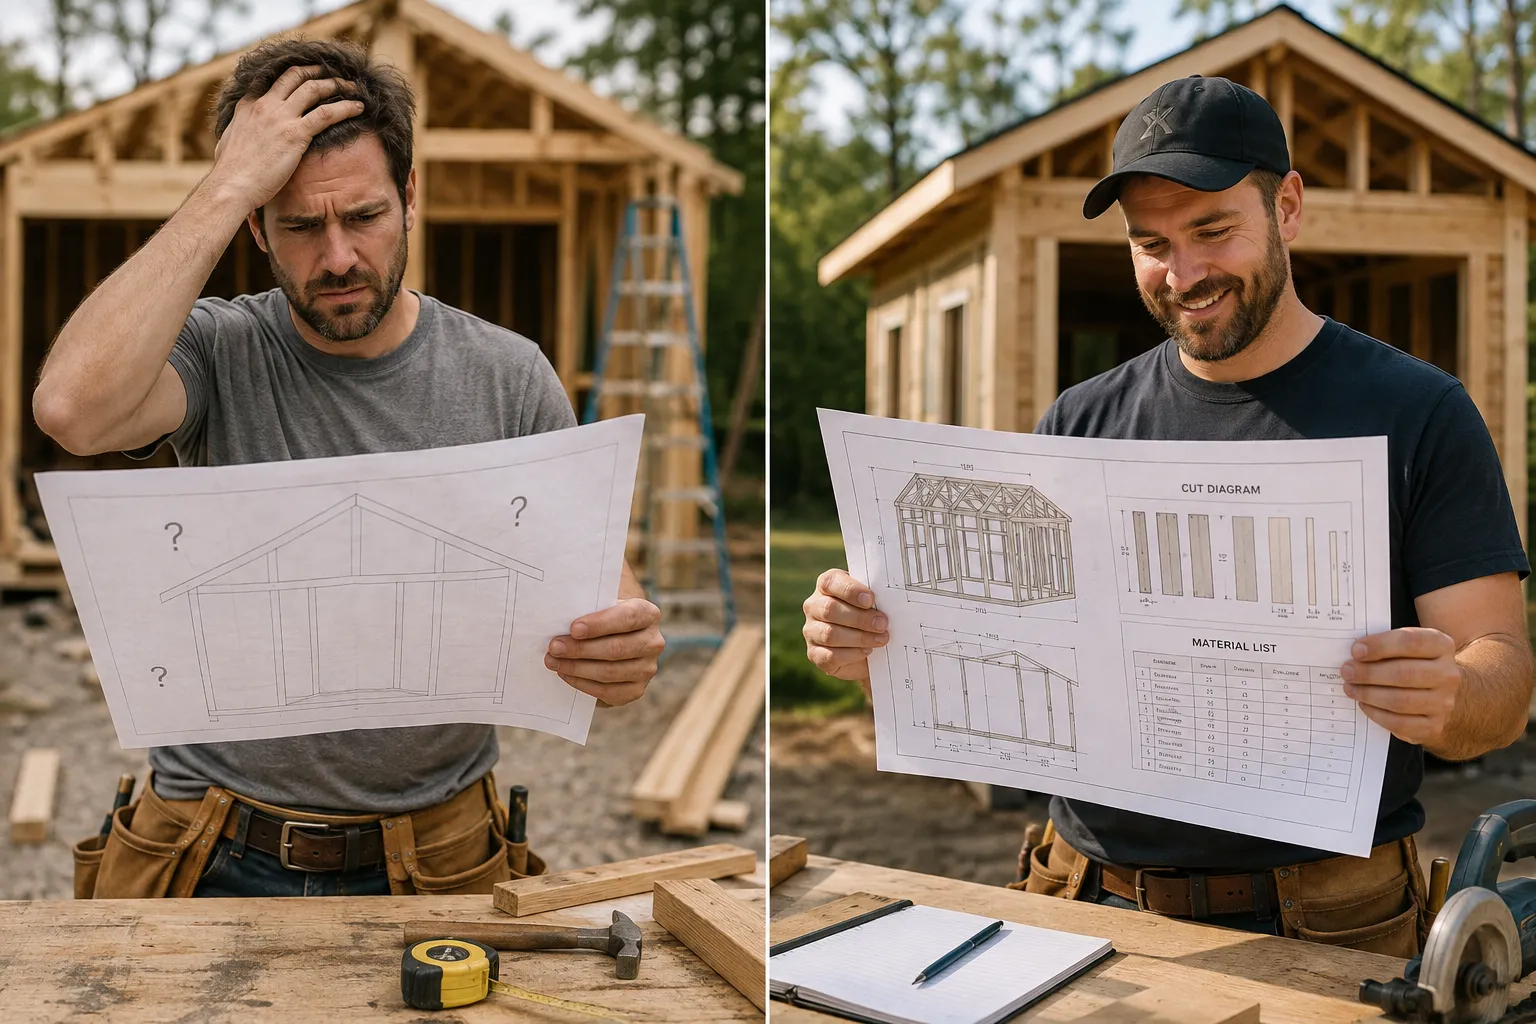
Three Elements Most Plans Skip
Most shed plans include basic dimensions and a material list, but three critical elements are frequently missing: cut diagrams, fastener schedules, and rafter cut angles. These omissions cause the most problems for builders and represent the highest value additions in quality plans.
Cut diagrams are missing from roughly 70% of shed plans, yet they can reduce material costs by 15-20%. Without them, builders make inefficient cuts that waste lumber and money. A good cut diagram shows exactly how to cut two 7-foot pieces from a 16-foot board, or how to get four 23-inch pieces from an 8-foot board with minimal waste.
Fastener schedules appear in fewer than half of available plans, leaving builders to guess at appropriate hardware. This guesswork leads to over-engineering (expensive) or under-engineering (dangerous). Professional plans specify 2.5-inch deck screws for floor joists, 3-inch framing nails for wall connections, and galvanized carriage bolts for critical structural joints.
Rafter cut angles are the most technically challenging aspect of shed construction, yet many plans simply show a basic roof outline without the precise angles needed. The bird’s mouth cut where rafters sit on the wall plate requires exact angles that vary with roof pitch. A 4/12 pitch requires different cuts than a 6/12 pitch, and getting these wrong means rafters won’t sit flush against the wall.
These three elements separate professional-grade plans from basic sketches. When evaluating options, prioritize plans that include all nine elements rather than settling for incomplete versions that create problems during construction.
What a Plan Does Not Need to Include
Quality shed plans focus on construction details rather than regulatory compliance, which varies by location and changes over time. Understanding what plans don’t need to include helps set realistic expectations and prevents paying extra for unnecessary features.
Building permits are not included because permit requirements vary dramatically between municipalities. Some areas allow sheds under 120 square feet without permits, while others require permits for any permanent structure. Plans can’t anticipate local requirements, so this remains the builder’s responsibility.
Site surveys are location-specific and require professional assessment of your actual property. Plans assume level ground and adequate drainage, but your site may need grading, drainage improvements, or setback considerations that no generic plan can address.
Local code compliance varies too much to include in universal plans. Wind load requirements differ between coastal and inland areas, snow load calculations change with elevation and latitude, and electrical codes vary by jurisdiction. Plans provide structurally sound designs, but local compliance requires separate research.
Soil conditions and foundation requirements depend on your specific location’s frost line, soil composition, and drainage characteristics. Plans typically specify minimum foundation requirements, but your site may need deeper footings or additional drainage measures.
Utility connections for electricity, water, or gas require local permits and professional installation in most areas. Plans may show conduit routes or outlet locations, but actual utility work falls outside the plan scope.
This focused approach keeps plans affordable and universally applicable while acknowledging that builders must handle site-specific and regulatory issues separately.
How Much Does It Cost to Build a Shed From Plans
Building from plans typically costs 40-60% less than buying a pre-built shed of equivalent size and quality. A 10×12 foot shed built from plans costs $800-1,500 in materials, while the same shed purchased pre-built costs $2,500-4,000 delivered and installed.
Material costs for a basic 8×10 shed range from $600-900, including lumber, roofing, siding, hardware, and foundation materials. Upgrading to premium materials (cedar siding, architectural shingles, better hardware) adds $300-600 to the total.
Time investment varies significantly with skill level. Experienced builders complete a 10×12 shed in 2-3 weekends, while beginners may need 4-6 weekends working at a comfortable pace. This time includes foundation preparation, framing, roofing, and finishing work.
Tool costs can add $200-500 if you need to purchase basic construction tools. Essential tools include a circular saw, drill, level, square, and measuring tape. Many builders rent expensive tools like nail guns or borrow from friends to reduce costs.
Hidden savings beyond material costs include customization options and timing flexibility. Building from plans allows you to add features like extra windows, custom shelving, or upgraded electrical without paying premium prices. You can also build during your schedule rather than waiting for contractor availability.
The break-even point typically occurs around 80 square feet – smaller sheds offer less savings due to fixed tool and setup costs, while larger sheds provide substantial savings that justify the time investment.
What Mistakes Do People Make When Building From Shed Plans
The most common mistake is starting construction before thoroughly reading and understanding the entire plan. Many builders jump straight to cutting lumber without studying how components connect, leading to expensive errors that require rebuilding sections.
Foundation shortcuts cause long-term problems that are expensive to fix. Builders often skip proper site preparation, use inadequate gravel bases, or ignore drainage requirements. A shed that settles unevenly will have doors that won’t close and potential structural damage.
Material substitutions without understanding structural implications create weak points. Substituting 2×4 lumber for specified 2×6 rafters may save money initially but can lead to roof sagging under snow loads. Always verify that substitutions maintain structural integrity.
Measurement errors compound throughout construction. A wall that’s 1/4 inch too long may not seem significant, but it affects every subsequent measurement and can prevent proper roof installation. Double-check all measurements before cutting.
Weather exposure during construction can damage materials and create safety hazards. Plan construction phases to minimize exposure time, and protect materials from rain and moisture that can cause warping or mold issues.
Tool inadequacy leads to poor results and safety risks. Attempting to make precision cuts with dull blades or inadequate tools produces sloppy joints that compromise structural integrity and appearance.
Rushing the foundation is particularly problematic because errors aren’t apparent until later construction phases. Take time to ensure the foundation is level, square, and properly drained before proceeding to framing.
Can I Modify a Shed Plan to Fit My Space
Most quality shed plans can accommodate minor modifications without compromising structural integrity, but significant changes may require engineering consultation. Understanding which modifications are safe helps you customize without creating problems.
Safe modifications include adjusting door and window locations within the same wall, changing exterior finishes (siding, roofing), adding interior features like shelving or workbenches, and modifying roof overhangs by small amounts (6 inches or less).
Dimension changes require careful consideration of structural implications. Increasing width or length by 2-4 feet usually works if you maintain the same framing spacing and foundation requirements. However, changes that affect span distances may require larger lumber sizes.
Roof modifications are more complex because they affect structural loads and water drainage. Changing roof pitch significantly alters rafter cut angles and may require different lumber sizes. Adding dormers or skylights requires additional structural support.
Foundation adaptations for sloped sites or different soil conditions are often necessary and generally safe if you maintain adequate support. Switching from a slab to a pier foundation, or adjusting pier spacing for local frost requirements, typically doesn’t affect the superstructure.
Electrical and plumbing additions can usually be incorporated during construction with minimal plan modifications. Running electrical conduit through walls or adding plumbing for a utility sink requires planning but doesn’t typically affect structural elements.
When to consult professionals: Major dimension changes (more than 25% increase in floor area), significant roof modifications, or changes that affect load-bearing elements should be reviewed by a structural engineer or experienced contractor.
What Tools Do I Need to Build a Shed From Scratch
Essential tools for shed construction fall into three categories: measuring and marking, cutting and shaping, and fastening and assembly. Having the right tools ensures quality results and safe working conditions.
Measuring and marking tools include a 25-foot tape measure, 4-foot level, speed square, chalk line, and pencil. These tools ensure accurate layout and square construction. A laser level can speed up foundation and framing work but isn’t essential for smaller sheds.
Cutting tools center around a circular saw with sharp blades for different materials. You’ll need a combination blade for general lumber cutting and a fine-tooth blade for finish work. A miter saw speeds up repetitive cuts but can be rented for specific phases.
Fastening tools include a drill with bits, hammer, nail set, and screwdrivers. A pneumatic nail gun significantly speeds framing work but requires an air compressor. Many builders rent nail guns for framing phases and use hand tools for finish work.
Specialty tools that improve results include a reciprocating saw for trimming, router for edge finishing, and clamps for holding assemblies during fastening. These aren’t essential but make certain operations much easier.
Safety equipment is non-negotiable and includes safety glasses, hearing protection, work gloves, and dust masks. A first aid kit should be readily available on the job site.
Tool rental considerations: Expensive tools used briefly (nail guns, laser levels, concrete mixers) are good rental candidates. Tools used throughout the project (circular saw, drill, measuring tools) justify purchase for most builders.
Quality tools produce better results and last for future projects, making them a worthwhile investment for anyone planning multiple building projects.
How Long Does It Take to Build a Shed From Plans
Construction time varies significantly based on shed size, builder experience, and available working time, but most weekend builders complete a 10×12 shed in 3-5 weekends working 6-8 hours per day.
Foundation phase typically requires one full day for site preparation, excavation, and foundation installation. Concrete slabs need additional curing time before framing can begin, while gravel pads allow immediate construction.
Framing phase including floor, walls, and roof structure usually takes 1-2 weekends for experienced builders or 2-3 weekends for beginners. This phase shows dramatic progress as the shed takes shape quickly.
Roofing and siding require another 1-2 weekends depending on material choices and weather conditions. Metal roofing installs faster than shingles, while board-and-batten siding takes longer than sheet siding.
Finishing work including doors, windows, trim, and interior features adds 1-2 weekends depending on the level of detail desired. Simple sheds with basic doors finish quickly, while sheds with multiple windows and custom features take longer.
Weather delays can extend timelines significantly, especially during roofing phases. Plan for weather contingencies and have indoor projects ready when outdoor work isn’t possible.
Skill level impact: Experienced builders work roughly twice as fast as beginners, but beginners often produce better results by working more carefully and double-checking measurements.
Helper availability can cut construction time dramatically during framing phases where extra hands help with lifting and positioning large assemblies.
Most builders find the timeline estimates in quality plans are realistic for their skill level, with experienced builders finishing ahead of schedule and beginners taking the full estimated time.
Are There Free Shed Plans Online or Should I Buy Them
Free plans are widely available online, but paid plans typically offer more comprehensive details, better support, and fewer construction problems. The decision depends on your experience level and project complexity.
Free plan advantages include zero upfront cost and the ability to review multiple designs before committing. Many government extension services and tool manufacturers offer basic shed plans that meet structural requirements for simple designs.
Free plan limitations often include incomplete material lists, missing construction details, and no support when problems arise. Many free plans lack the nine essential elements discussed earlier, particularly cut diagrams and fastener schedules.
Paid plan benefits include comprehensive material lists, detailed construction drawings, customer support, and often video tutorials or photo galleries. Quality paid plans typically cost $20-50 but can save hundreds in material waste and construction errors.
MyShedPlans and similar comprehensive collections offer multiple designs with full construction details, material lists, and ongoing support. The cost per plan drops significantly when purchasing collections rather than individual designs.
Quality indicators for any plan include complete material lists organized by lumber length, detailed foundation specifications, wall framing layouts with stud spacing, and rafter cut angles. Plans missing these elements will cause problems regardless of cost.
Experience considerations: Beginners benefit more from paid plans with comprehensive details and support options. Experienced builders may successfully use free plans by filling in missing details from their knowledge base.
The time and material savings from quality plans typically justify the cost for most builders, especially those tackling their first shed project.
What Building Codes Do I Need to Know for Sheds
Building codes for sheds vary by location, but common requirements focus on size limits, setbacks from property lines, foundation specifications, and structural standards. Understanding these basics helps ensure compliance and safety.
Size thresholds trigger different requirements in most jurisdictions. Sheds under 100-120 square feet often require no permits, while larger structures need building permits and inspections. Height limits typically range from 12-15 feet for accessory structures.
Setback requirements specify minimum distances from property lines, typically 3-10 feet depending on local zoning. Corner lots may have additional restrictions, and some areas prohibit sheds in front yards entirely.
Foundation codes often require concrete footings below the frost line for permanent structures, though some areas allow gravel pads or treated lumber foundations for smaller sheds. Proper drainage and moisture barriers are typically required.
Structural requirements include wind and snow load calculations that vary by geographic region. Coastal areas have higher wind requirements, while northern climates specify heavier snow loads that affect roof framing.
Electrical codes apply when adding power to sheds and typically require GFCI protection, proper grounding, and permits for permanent installations. Many builders use temporary extension cords to avoid electrical permit requirements.
HOA restrictions may be more stringent than municipal codes and can include appearance requirements, material specifications, and approval processes. Check HOA rules before beginning any shed project in deed-restricted communities.
Research methods include contacting local building departments, checking municipal websites, and consulting with local contractors familiar with area requirements. Requirements change periodically, so verify current codes rather than relying on outdated information.
Best Shed Plans for Small Yards
Small yards require careful planning to maximize storage while maintaining aesthetic appeal and property functionality. The best small-yard shed plans emphasize vertical storage, multi-purpose design, and minimal ground footprint.
Vertical designs make the most of limited ground space by building up rather than out. Tall, narrow sheds (6×8 or 8×8 footprints with 10-12 foot walls) provide substantial storage while using minimal yard space. High ceilings accommodate tall tools and allow overhead storage.
Corner placement strategies utilize often-wasted corner areas effectively. L-shaped or corner-specific designs fit against property lines while maintaining required setbacks. These designs often incorporate angled doors or wrap-around access for convenience.
Multi-purpose structures combine storage with other functions like potting benches, outdoor bars, or covered seating areas. These designs justify their space usage by serving multiple needs rather than just storage.
Lean-to designs attach to existing structures like houses or garages, reducing the footprint while providing weather protection and structural support. These work well for narrow side yards where freestanding structures won’t fit.
Compact organization features built into the design maximize storage efficiency. Wall-mounted tool racks, overhead storage systems, and fold-down work surfaces help organize tools without requiring floor space.
Aesthetic considerations become more important in small yards where sheds are highly visible. Plans that incorporate attractive details like window boxes, decorative trim, or coordinated colors help sheds enhance rather than detract from yard appearance.
Access planning ensures adequate clearance for doors and equipment removal. Even small sheds need 3-4 feet of clear space in front of doors for practical use.
Shed Plans for Different Climates and Weather
Climate considerations significantly impact shed design requirements, from foundation specifications to roofing materials and ventilation needs. Choosing plans designed for your climate ensures longevity and performance.
Cold climate modifications include steeper roof pitches (8/12 or greater) to shed snow loads, reinforced roof framing to handle snow weight, and foundation systems that extend below frost lines. Vapor barriers become critical to prevent condensation and ice formation.
Hot climate adaptations emphasize ventilation, shade, and heat-resistant materials. Ridge vents, gable vents, and overhangs help manage heat buildup. Light-colored roofing and siding reflect heat rather than absorbing it.
High wind areas require additional structural bracing, stronger foundation connections, and impact-resistant materials. Hurricane straps, reinforced wall sheathing, and properly anchored foundations become essential rather than optional.
Wet climate considerations include enhanced moisture barriers, improved drainage systems, and rot-resistant materials. Raised foundations, proper flashing, and adequate overhangs protect against water damage.
Dry climate features focus on fire resistance, UV protection, and expansion joint management. Non-combustible roofing, defensible space planning, and materials that handle temperature swings become priorities.
Coastal environments combine multiple challenges including salt air, high winds, and moisture. Galvanized or stainless steel fasteners, marine-grade finishes, and enhanced structural connections address these combined stresses.
Material selection varies significantly by climate. Cedar and redwood perform well in wet climates, while metal siding and roofing excel in fire-prone areas. Pressure-treated lumber requirements also vary by moisture exposure.
Quality plans specify climate-appropriate materials and construction methods, but builders may need to adapt generic plans for extreme local conditions.
How Do I Know if a Shed Plan is Structurally Sound
Evaluating structural soundness requires examining foundation specifications, framing details, and connection methods to ensure they meet or exceed typical building standards for your area’s load requirements.
Foundation adequacy starts with proper sizing for the structure weight and local soil conditions. Concrete footings should extend below frost lines, and pier spacing should not exceed 8 feet for typical shed loads. Inadequate foundations cause settling and structural problems.
Framing specifications should match or exceed standard residential construction practices. Wall studs spaced 16 inches on center handle typical loads better than 24-inch spacing. Floor joists should be sized appropriately for span distances – 2×8 joists work for spans up to 12 feet, while longer spans need 2×10 or engineered lumber.
Roof framing requires careful evaluation of rafter sizing versus span and load requirements. A 4/12 pitch roof with 2×6 rafters works for spans up to 14 feet in most climates, but areas with heavy snow loads may require 2×8 rafters or closer spacing.
Connection details separate professional plans from amateur sketches. Proper plans specify how rafters connect to walls (hurricane ties), how walls connect to foundations (anchor bolts), and how floor joists connect to beams (joist hangers).
Load calculations should be appropriate for your climate. Snow loads vary from 20 pounds per square foot in mild climates to 50+ pounds in heavy snow areas. Wind loads range from 90 mph basic wind speed in calm areas to 150+ mph in hurricane zones.
Professional review may be worthwhile for large or complex sheds. A structural engineer can verify that plans meet local requirements and suggest modifications if needed. This typically costs $200-500 but prevents expensive problems.
Red flags include missing connection details, undersized lumber for spans, inadequate foundation specifications, or plans that don’t specify load requirements. Quality plans address these elements explicitly rather than leaving them to builder judgment.
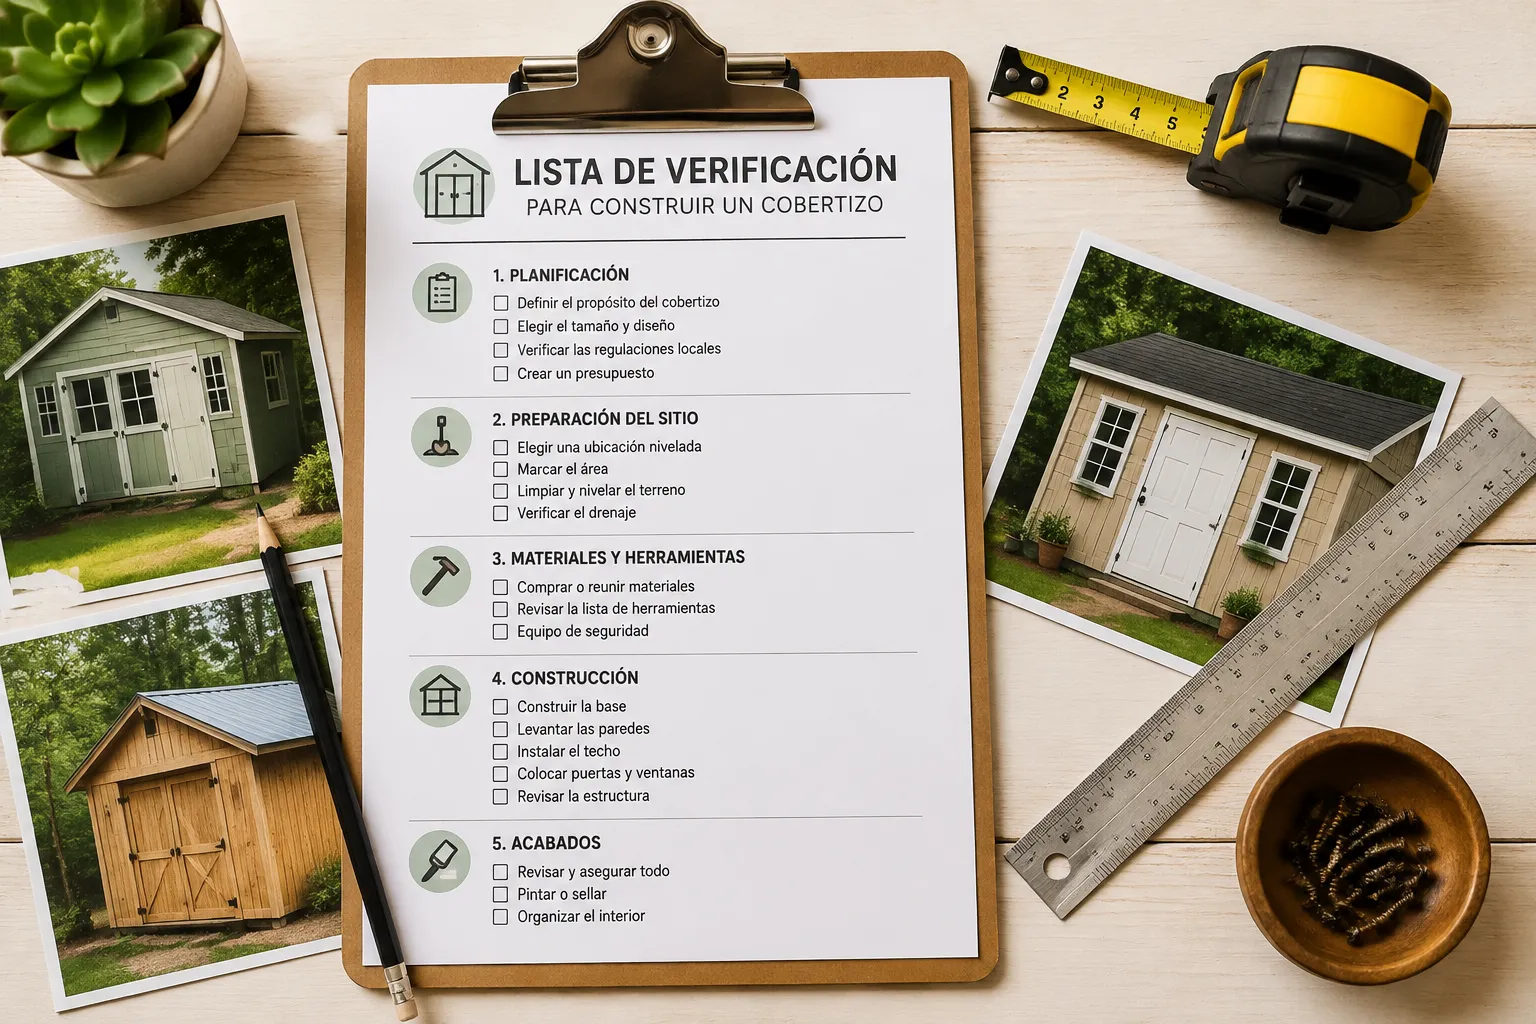
Use This as a Buying Checklist
Save or print this checklist to evaluate shed plans before purchasing. Quality plans should include all nine elements – missing components often indicate incomplete or amateur-level plans that will cause construction problems.
Essential Plan Elements Checklist:
□ Overall dimensions with elevations – Shows all four sides with measurements and roof details
□ Foundation and floor detail – Specifies footing type, size, and floor construction method
□ Wall framing layouts – Details stud spacing, corner construction, and header specifications
□ Rafter/truss templates – Includes cut angles, bird’s mouth details, and connection methods
□ Door and window schedule – Lists sizes, rough openings, and hardware requirements
□ Shopping list by board length – Organizes materials to minimize waste and store trips
□ Cut diagram – Shows efficient cutting patterns from standard lumber lengths
□ Fastener schedule – Specifies screws, nails, and bolts for each connection type
□ Tool list – Identifies required and optional tools for construction
Quality Indicators:
□ Plans specify lumber grades and species where critical
□ Foundation details appropriate for your climate/soil conditions
□ Roof framing sized adequately for local snow/wind loads
□ Connection details shown clearly (not just implied)
□ Material quantities include 5-10% waste allowance
□ Customer support or contact information provided
□ Plans updated within last 5 years for current code compliance
Bonus Features:
□ Step-by-step construction sequence
□ Photo gallery of completed projects
□ Video tutorials for complex operations
□ Multiple size options from same basic design
□ Customization guidelines for modifications
Use this checklist to check the library against this list and ensure you’re getting comprehensive plans that will support successful construction. Plans missing multiple elements from this checklist often create problems that cost more than purchasing quality plans initially.
Find Complete Shed Plans That Include All Nine Elements
Don’t settle for incomplete plans that leave you guessing about critical construction details. Quality shed plans with all nine essential elements prevent costly mistakes, reduce material waste, and ensure structural integrity that lasts for decades.
The difference between amateur sketches and professional plans becomes clear during construction when you need specific details about rafter cuts, foundation requirements, or material quantities. Comprehensive plans guide you through every step while incomplete plans leave you making expensive guesses.
Whether you’re building your first shed or your fifth, having complete plans with cut diagrams, fastener schedules, and detailed material lists makes the difference between a smooth project and a frustrating experience filled with extra store trips and wasted materials.
Ready to start your shed project with confidence? Browse the complete collection of professional shed plans at https://outdoorbuild.com/shedplans and find designs that include all nine essential elements for successful construction.
FAQ
Q: How detailed should shed plans be for a beginner builder?
A: Beginner builders need plans with all nine essential elements, especially cut diagrams and fastener schedules. Look for plans that include step-by-step instructions and specify exact lumber sizes rather than leaving details to interpretation.
Q: Can I use shed plans designed for different climates?
A: Basic shed plans work across most climates, but you may need to modify foundation depth, roof pitch, or lumber sizes for extreme conditions. Consult local building codes for specific requirements in your area.
Q: What’s the most important element missing from free shed plans?
A: Cut diagrams are most commonly missing from free plans, leading to 15-20% material waste. Fastener schedules are the second most important missing element, leaving builders to guess at appropriate hardware.
Q: How do I know if lumber sizes in plans are adequate for my area?
A: Compare plan specifications to local building codes or consult a structural engineer for large sheds. Most quality plans use conservative lumber sizes that exceed minimum requirements for typical residential loads.
Q: Should shed plans include electrical layouts?
A: Basic shed plans don’t need electrical layouts since requirements vary by local codes and intended use. However, plans should accommodate electrical installation by showing wall framing that allows conduit routing.
Q: What size shed can I build without a permit?
A: Most areas allow sheds under 100-120 square feet without permits, but requirements vary significantly by municipality. Check local building departments for specific size limits and setback requirements.
Q: How much extra material should I buy beyond the plan quantities?
A: Add 5-10% to lumber quantities for waste and mistakes. Buy extra fasteners since they’re inexpensive and useful for future projects. Don’t over-buy expensive items like roofing or siding.
Q: Can I modify shed dimensions without affecting structural integrity?
A: Minor dimension changes (2-4 feet) usually work if you maintain framing spacing and foundation requirements. Larger changes may require different lumber sizes or engineering review.
Q: What’s the difference between $20 plans and $200 plan collections?
A: Individual plans typically cover one design with basic details, while collections offer multiple designs with comprehensive construction support, video tutorials, and customer service. Cost per plan drops significantly with collections.
Q: How long should quality shed plans remain useful?
A: Well-designed shed plans remain useful indefinitely since basic construction methods don’t change significantly. However, building codes evolve, so verify current requirements regardless of plan age.
Q: What tools can I rent instead of buying for shed construction?
A: Rent expensive tools used briefly like nail guns, laser levels, and concrete mixers. Buy tools used throughout the project like circular saws, drills, and measuring equipment.
Q: How do I verify that shed plans meet structural requirements?
A: Look for plans that specify load requirements, use appropriate lumber sizes for spans, and include proper connection details. When in doubt, have a structural engineer review plans for large or complex sheds.
Conclusion
Building a shed from quality plans offers significant savings and customization opportunities, but success depends on choosing plans with complete construction details. The nine essential elements – dimensions with elevations, foundation details, wall framing layouts, rafter templates, door/window schedules, organized material lists, cut diagrams, fastener schedules, and tool lists – separate professional plans from basic sketches.
Missing elements like cut diagrams and fastener schedules cause the most problems during construction, leading to material waste, structural issues, and project delays. Investing in comprehensive plans prevents these problems while ensuring your shed provides decades of reliable service.
Use the provided checklist to evaluate plans before purchasing, and don’t compromise on essential elements to save a few dollars upfront. Quality plans pay for themselves through reduced material waste, fewer construction problems, and better finished results.
Start your shed project with confidence by Clicking Here and choosing plans that include all nine essential elements and provide the detailed guidance needed for successful construction.

SEO Meta Title: What Should a Good Shed Plan Include? 9 Essential Elements
SEO Meta Description: Discover the 9 essential elements every quality shed plan needs. From cut diagrams to fastener schedules, learn what separates professional plans from basic sketches.